A great website that offers SVG and DXF vector files for silhouette and cricut users. Their files also come as Mirrored PDF's if you want to use them for iron on transfer files. Check them out!
https://www.scribbledownloads.com/
Monday, August 27, 2018
Friday, January 31, 2014
Boat Bed - Years Later
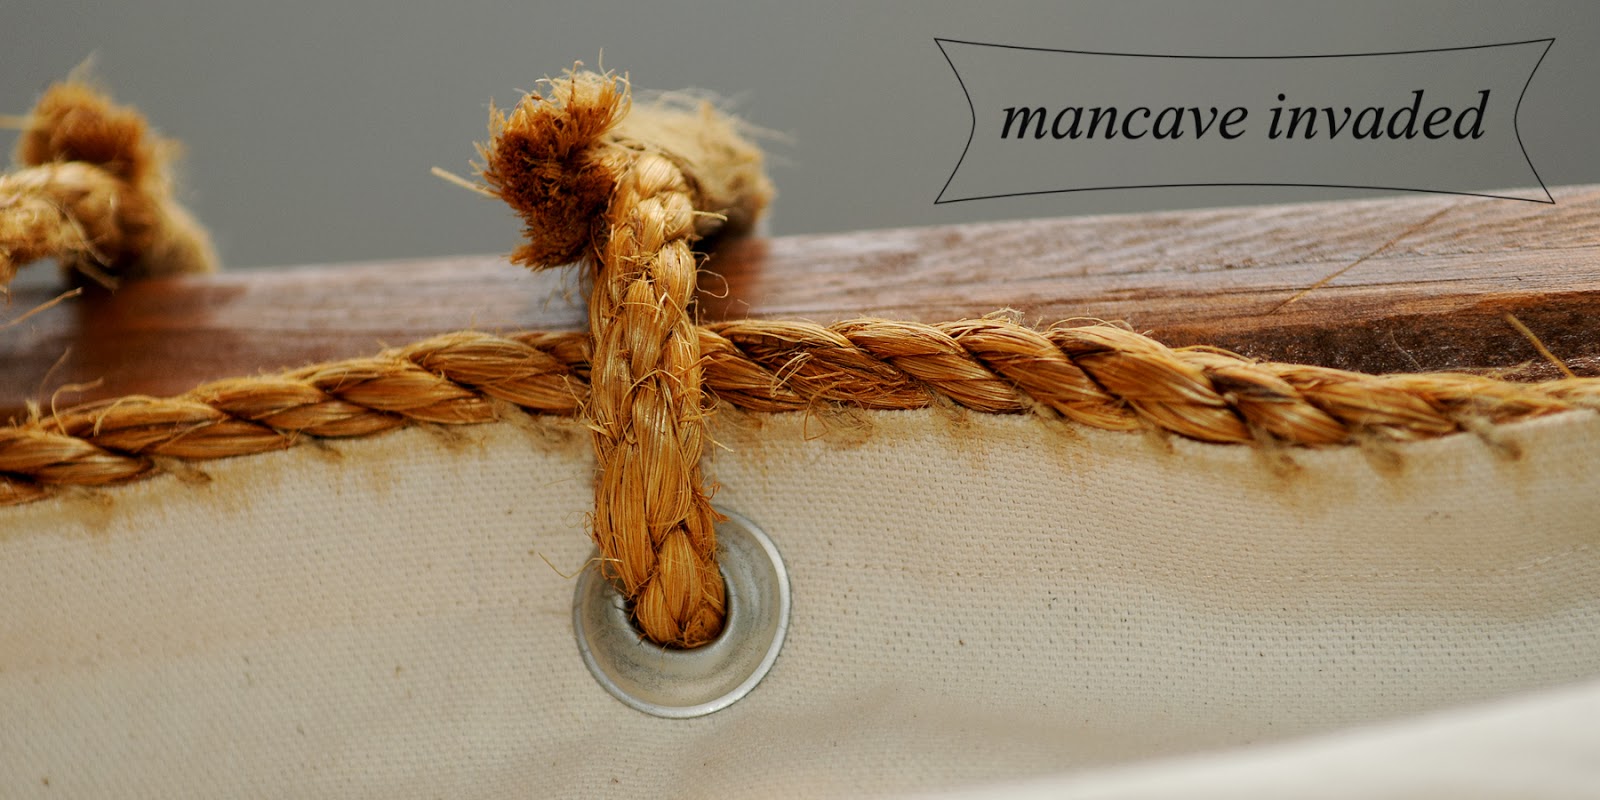
In 2005 my husband decided he was going to build our boys a "boat bed."
There wasn't a pinterest to gather ideas back then. :)
He envisioned this in his mind.
He read books on how to bend wood.
He read books on how a sailboat was constructed.
He bought books about 'sails' and 'knots' sailors used.
It was a months long project.
I didn't own a nice camera.
Our boys were 18 months and 3 at the time.
I would occasionally go into the garage and snap a picture.


Having lived in an apartment thus far into our marriage,
we were both very aware it needed to come apart and be transportable.
Scott took this into consideration and built it so it could come apart.

The bed has been with us since 2005.
Our 3 year old is now 12, going on 13.
It's moved 4 times successfully.
It's solid.
I was certain our children would outgrow it by age 9.
Not so.
Our oldest is determined to sleep in it until he leaves home.
I guess what I am getting at is,
how nice it is to have something quality built that has lasted.
 |
| Boat Bed in 2008 |
The 2 boys slept in it together for many years.
Until daddy built our younger son the bed he dreamed of - a Star Wars bed.

Although the décor has changed as the kids have matured,
the boat remains as steadfast and sturdy as ever.


Sewing Thread and Bobbin Holder
I realize you can buy these at the big retail stores.
 |
| Finished Size: 9.75" x 25.5" |
But, I wanted to make one to fit a specific space by my sewing desk.
I also didn't want a nail to hold the bobbin like I've seen a lot of.
I also didn't want a nail to hold the bobbin like I've seen a lot of.
I will post my sizes, but obviously you could use the same techniques and make it custom
for your specific space.
SUPPLIES NEEDED:
Poplar Wood
(3) 4' lengths of 3/4" x 1.5" poplar.
Dowels
(1) 4' length 3/16" (bobbin holders)
(1) 4' length 1/2" (to cover screws)
Screws
(8) self tapping counter sink screws
TOOLS USED:
band saw
chop saw
drill press
drill
clamps
tape measurer / ruler
square
wood glue
sander
drill bits
* (3/16" brad point precision bit)
* (1/2" countersink bit)
* inside squaring / clamping tool (free pattern here)
BUILDING IT
1. Cut your poplar
(2) 9.75
(4) 24"
FOR OUR TIPS ON MEASURING AND CUTTING CLICK HERE

2. Measure where bobbin pegs will be located
Here I ran into problems.
A ruler is not my strongest area of expertise.
I get the 1/4", 1/2" but mention 5/16" and I get overwhelmed.
My first idea was to simply start at 3/4", and measure every 1.75" from there.
That did not turn out well, as the pegs ended close to the edge of the wood, not centered.
Scott's showed me his method, once he saw my troubles.
(I realize it's probably just me that didn't know how to do this.)
I knew I wanted my first peg to begin 3/4" from both ends.
So, mark the 3/4" from both ends:

Then, take your ruler and find the middle of these 2 lines.
(which ends up as 11 1/4" from the end of the board)
Keep proceeding this way.
measure from the 3/4" and the 11.25" and find the center of that.
etc.
Measuring for the middle between 2 lines:

Soon you will have a board with nice, evenly placed marks!
(FYI - the marks ended up being 1 & 14/16" apart.
I am not a math whiz, and never could've figured that out with a calculator...)
3. Mark bobbin peg location for drill
I knew I wanted the bobbins in the middle of the 3/4" height board.

Create a + using the tick mark's you've measured, plus the center line of the board,
thus making no guess work for where to drill.

4. Drill the peg holes
I do have a drill press (or rather, the mancave has one) so I used that.
If you only have a drill, it's no problem.
My suggestion is this though.
Use a "brad point" precision drill bit.
(What is that?! I will explain because I had no clue either)
Notice the difference between these 2 drill bits?

The little point on the brad point bit ensures it enters right where you want it to.
It doesn't 'dance' around on the wood, creating a hole wherever it catches first.
(which is often my problem!)
Holes drilled:

5. Cut 3/16" bobbin pegs
I also have access to a band saw in the mancave.
Set up the 'fence' or guide at 3/4" so all you have to do is cut the pieces.
You will use the 3/16" dowel, and cut 52 of them.

6. Glue pegs in place
Again, if Scott hadn't shown me, I would've made a big gluey mess.
I was about to dip the pegs in glue and mash them into the holes...
They don't need that much glue as it's a snug fit.
Use a toothpick or similar.
Dip it in the glue and use this to get the glue into the hole.
Then simply twist your peg in.

Pegs in!

7. Assemble the pieces
This is always the hardest part for me.
I always feel like I am not strong enough, or I need another hand.
Scott made me an inside 'clamping square' that really made my job easier.
You can make one too!
Template HERE
First, Measure where you will be drilling the 2 holes.
Second, set your countersink bit to the right depth:

Get your first corner ready for drilling:

Drill out your holes.
Learn from my hesitancy.
I was nervous to pull the drill trigger all the way.
If you go too slowly, the wood will chip out, as shown.

Add your wood glue, and put the countersink screws in.
INFO ON DIFFERENT TYPES OF SCREWS, CLICK HERE
Pieces attached together!

Continue this with all your corners.
8. Assemble the shelves
I then simply used the nail gun (and glue) to attach the shelves.
Thread hardly weighs anything, I felt the corners needed strength to hold it's shape,
but the shelves were fine with a nail...

ABOVE AND BEYOND
You COULD be done at this point.
OR, you could go one more fun step further
and really finish off your new thread holder.
Make it something to be proud of.
This is where the 1/2" dowel comes into play.
We are going to cover up the screw heads.
Squeeze some glue into the hole.
Twist the 1/2" dowel into hole, spreading around the glue.
Cut off the peg.

Beautiful.
No exposed screw heads.
It looks like you really know what you're doing now!

Now finish it off any way you want.
I added some wood filler to fill in my chips that were due to my hesitancy.
I sanded it down.
And, I ended up painting it white to match my room.


Wednesday, January 29, 2014
What's it Made of?
It can be difficult to know when a piece of furniture is worth restoring, or fixing up.
I have brought home my fair share of cheaply constructed pieces that weren't worth the
time and effort.
So, let's look at furniture construction, refinishing options and
figuring out what's what.
I have brought home my fair share of cheaply constructed pieces that weren't worth the
time and effort.
So, let's look at furniture construction, refinishing options and
figuring out what's what.
SOLID WOOD:
What is it?
Wood. Solid wood. No substitutions.
How to spot
- Weight is a good indicator. It will be heavy when you lift it. Really solid.
- Look underneath, or in drawers. Notice the way the furniture piece was put together.
- Look for wood grain on the underside of the finished piece. This is a good indication it is solid wood.
- It may even be finished with a thick lacquer making it appear 'shiny' and 'fake.'

How to refinish
- You can sand the heck out of solid wood.
- You can also use a paint / stain stripper first, then sand. (if it has the shiny lacquer finish)
- You can paint, stain, any way you want.
- Wood will dry out, so it's important that once you do sand it or strip it down, you finish it with something. Otherwise it will crack over time.
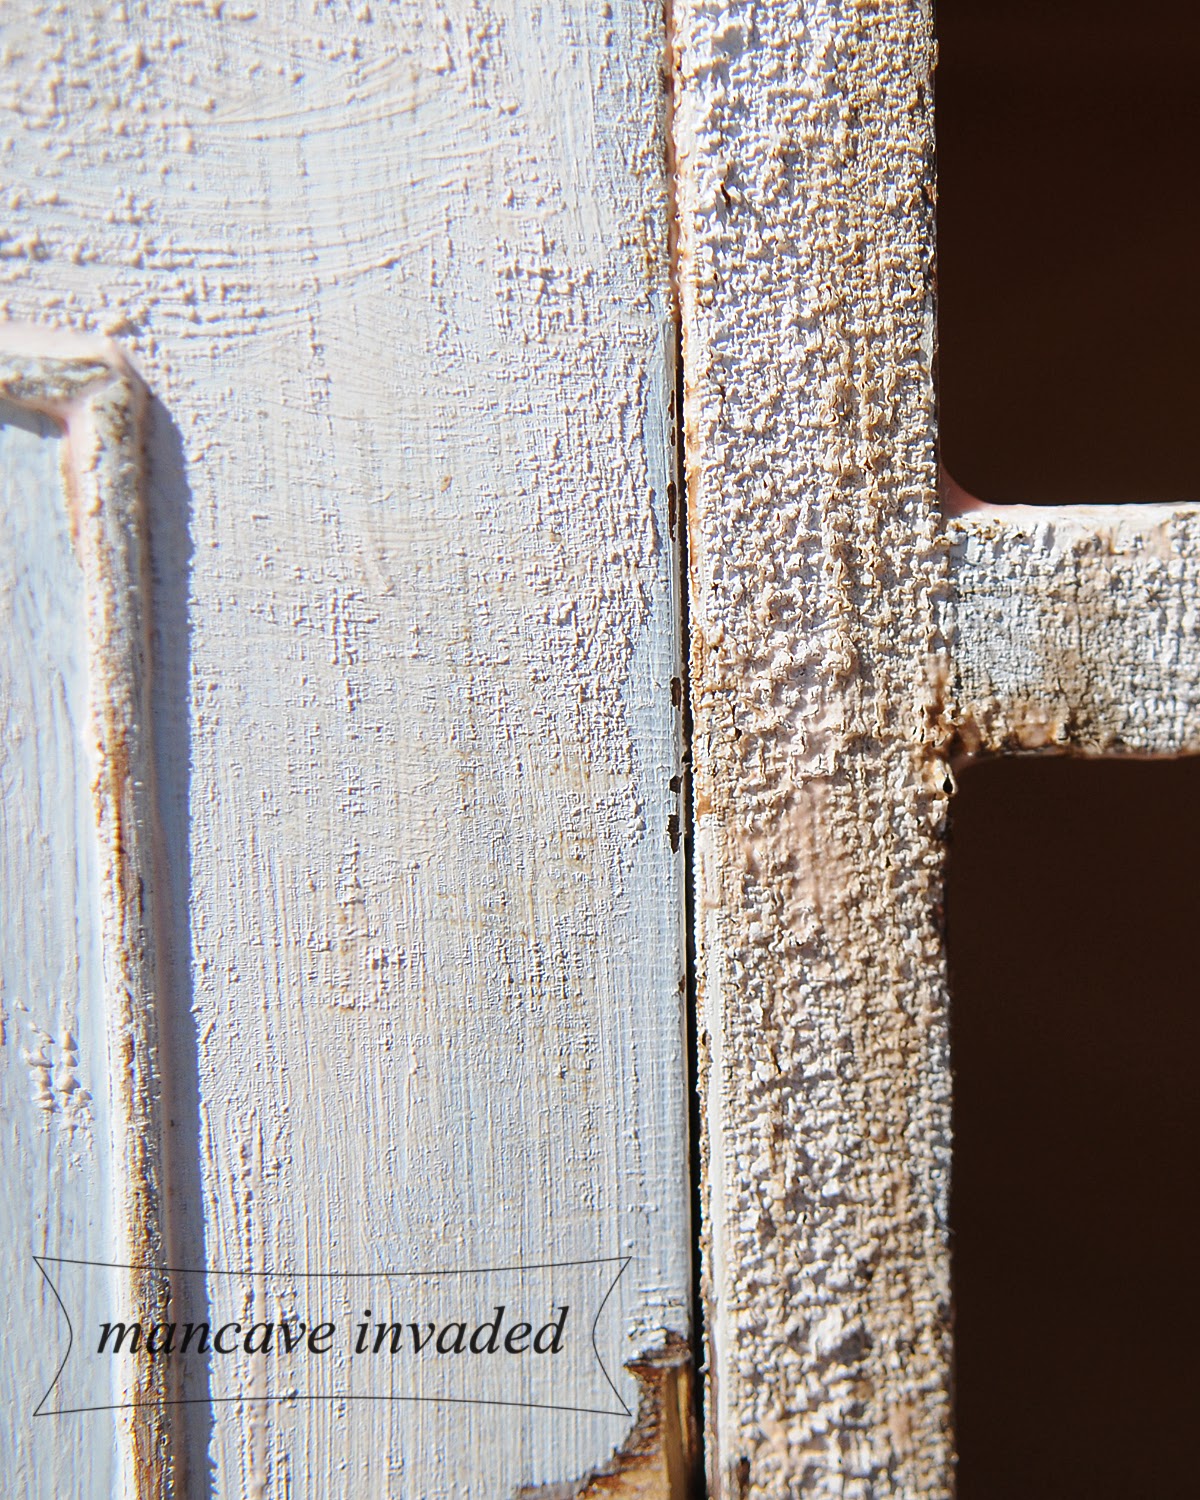
WOOD / VENEER:
What is it?
Veneer is a thin decorative (beautiful grain) hardwood applied to the top of a courser (cheaper) wood.
How to spot
- Look at the edge of the furniture - if you see stripes, that's a sign it's most likely veneer.
- It is less expensive to build this way, so you'll see it often.

Looking at a drawer:

How to refinish
- The issue with wood / veneer is if you try to sand it, you will likely sand right through the veneer, and then a cheaper not as pretty of wood will show through. Sad day when that happens. (see photo below)
- To refinish - use a paint / stain stripper. I like citristrip. It's easy to use and doesn't smell nearly as lethal as some of the others out there.
- Once you've used the stripper as indicated, you can then use light hand sanding to finish off the piece. I wouldn't use a power sander - you'll go right through the veneer before you know what's happened.
- I often use a wire brush in the stripper to finish off inside corners and tight spaces that are on the veneer.

LAMINATE:
(otherwise known around here as, FAKE WOOD)
What is it?
- On the inside it is particle board.
- Particle board is small woodchips, sawdust, or even wood shavings that have been put under pressure and mushed together.
- The particle board is then covered with a laminate.
- It is often used when strength and appearance can be sacrificed, because it's cheap.
Particle board
&
Particle board with a laminate veneer.
 |
| image via Wikipedia |
How to spot
- It comes in all colors, and is often disguised to look like a wood grain. So, don't let that deceive you...
- The back will often be a thin layer of pressboard or cardboard type material.
- Corners may be dented, as it's easy to mash this laminate when moving.
- It's much lighter weight than solid wood, or wood/veneer.
- If you wiggle it, it will most likely wobble. :)
- Shelves will sag.
- Remember - appearance wasn't the key element. Therefore, it will be simple in design.

How to refinish
- This is where spray paint comes in. (use an all in one primer and paint if possible)
- You can't sand this. Or rather, I guess you could - pinterest says you can. I wouldn't.
- You can't stain it. (Again, pinterest may differ...) It would be like rubbing stain on plastic.
- You can paint it with a primer first and then paint if desired.
 |
| It does it's job. Not the prettiest piece of furniture, but it was free on Craig's List so I spray painted it red. |
-------------
CONCLUSION:
So, what's the best?
Depends on what you want, or plan to do with it!
I rarely bring home particle board / laminate / fake wood.
But, occasionally, like in the bookcase above, I needed it and it was free and it serves its purpose.
The solid wood is the most fun (for me) to refinish.
So long as I have help loading and moving the piece around as it is often very heavy.
The veneer often has a lot of character, and I like that about it.
You will often find a solidly built piece of furniture that has a wood / veneer top.
If the veneer top is flaking like in my picture above - you can always build a new top instead and salvage that beautiful piece of furniture!
If it was built right - the table top piece should be fairly easy to remove.
Monday, January 27, 2014
Rules of Trespass
It's taken me a few years to be able to enter and use the mancave space without it bothering Scott.
(too much)
A few tips I've learned:
#1. DON'T CHANGE IT
You cannot enter the 'mancave' with the intent to change anything about the space.
Don't look around and wonder how you could decorate it.
There will be things from when he was younger
staking his claim upon the space...
(perhaps it's a tribute to his freedom gone)
(perhaps it's a tribute to his freedom gone)

Things you won't let him hang in the house with the excuse, "It will scare the children."

There will be momentos from the kids, although long out of 'season'.
Yes, dusty Santa holds the pencils and pens year round here...

It doesn't matter.
Just be glad you are being allowed access.
Look past the décor...
Look past the décor...
And don't suggest changing anything about it.
#2. PUT IT WHERE IT GOES
If you borrow a tool, put it back.
This means, don't just throw it on the workbench with what you assume are the other
'miscellaneous' tools he needs to put away anyway.
'miscellaneous' tools he needs to put away anyway.
He'll know.
Although it may look like a haphazard mess, believe me,
he has his own organization system going on.
He wants things where he put them, not where you put them. :)
He wants things where he put them, not where you put them. :)


#3. USE TOOLS ONE AT A TIME
As a woman, if I am baking in the kitchen I like to look over the recipe and get out all
the ingredients I will need.
the ingredients I will need.
I then place them on the counter for quick access as I am baking.
THE MANCAVE DOES NOT WORK THIS WAY!
If you get out a pile of all the tools you are going to need during one project you
will be banned from the cave...
will be banned from the cave...

For instance:
Use the measuring tape, mark your wood, and put the ruler back.
Use the measuring tape, mark your wood, and put the ruler back.
THEN proceed to the saw to cut your piece of wood.
#4. DON'T TALK TOO MUCH
Scott is very patient and listens to me talk a lot.
When in the mancave, he is there to do his own thing.
He enjoys my company, but not for me to nag and complain.
So, if it's quiet besides the music he's decided to listen to
and the power tools, let it stay that way.
When in the mancave, he is there to do his own thing.
He enjoys my company, but not for me to nag and complain.
So, if it's quiet besides the music he's decided to listen to
and the power tools, let it stay that way.
Occasionally, another guy will come to Scott's mancave.
I used to think this a social occasion.
But, as I would poke my head out there, to see how it was going
I was often surprised to find 2 men with their bodies hunched over
their own projects and no verbal communication. ????
So, no meaningless chit-chat.
That's a girl thing...
That's a girl thing...
#5. THANK HIM
If he helps you with a project, be sure to thank him.
Be appreciative that he helped you build a birdhouse he would've rather not built.
Be appreciative that he helped you build a birdhouse he would've rather not built.
A "Thank you so much! I love it! You are awesome!"
with a little peck on the cheek goes a LONG way.
...and it ensures re-entry into the cave...
with a little peck on the cheek goes a LONG way.
...and it ensures re-entry into the cave...
Tuesday, August 20, 2013
Buffet Hutch
As women, I think we feel a need to rescue things.
I've brought home my share of puppies needing mothering...
I've also brought home plenty of furniture that needs some loving care.
I found this sad story at Goodwill.

Being that this buffet is made from a veneer, I couldn't just take a power sander to it.
I opted for citri-strip to get the white paint off.

First, apply the stripper with a brush or rag and let it sit for an hour or so.
After it's soaked in, it should bubble and flake and look like this:
TIP - don't leave it for days, thinking you'll get to it later.
It isn't as easy to remove later.
Once it looks loose like above, it's time to scrape with a putty knife:

The stripper does a pretty good job at removing the sticky grime and most of the paint.
This is the door after one application of citri-strip and a putty knife to remove.

Obviously, this wasn't the look I was going for.
So, time for application #2.
This time, I applied the citri-strip and then began scrubbing it with a wire bristled brush.
Here you can see the difference between
just a putty knife vs. wire brush.

From here I was able to use a light grit sand paper and get the rest of the paint off.
It did take some effort...
But then it was ready to be stained!
The fun part.
I went with a minwax dark walnut stain.

Recap:

I found this sad story at Goodwill.
Being that this buffet is made from a veneer, I couldn't just take a power sander to it.
I opted for citri-strip to get the white paint off.
First, apply the stripper with a brush or rag and let it sit for an hour or so.
After it's soaked in, it should bubble and flake and look like this:
TIP - don't leave it for days, thinking you'll get to it later.
It isn't as easy to remove later.
Once it looks loose like above, it's time to scrape with a putty knife:
The stripper does a pretty good job at removing the sticky grime and most of the paint.
This is the door after one application of citri-strip and a putty knife to remove.
Obviously, this wasn't the look I was going for.
So, time for application #2.
This time, I applied the citri-strip and then began scrubbing it with a wire bristled brush.
Here you can see the difference between
just a putty knife vs. wire brush.
From here I was able to use a light grit sand paper and get the rest of the paint off.
It did take some effort...
But then it was ready to be stained!
The fun part.
I went with a minwax dark walnut stain.
Recap:
Subscribe to:
Posts (Atom)